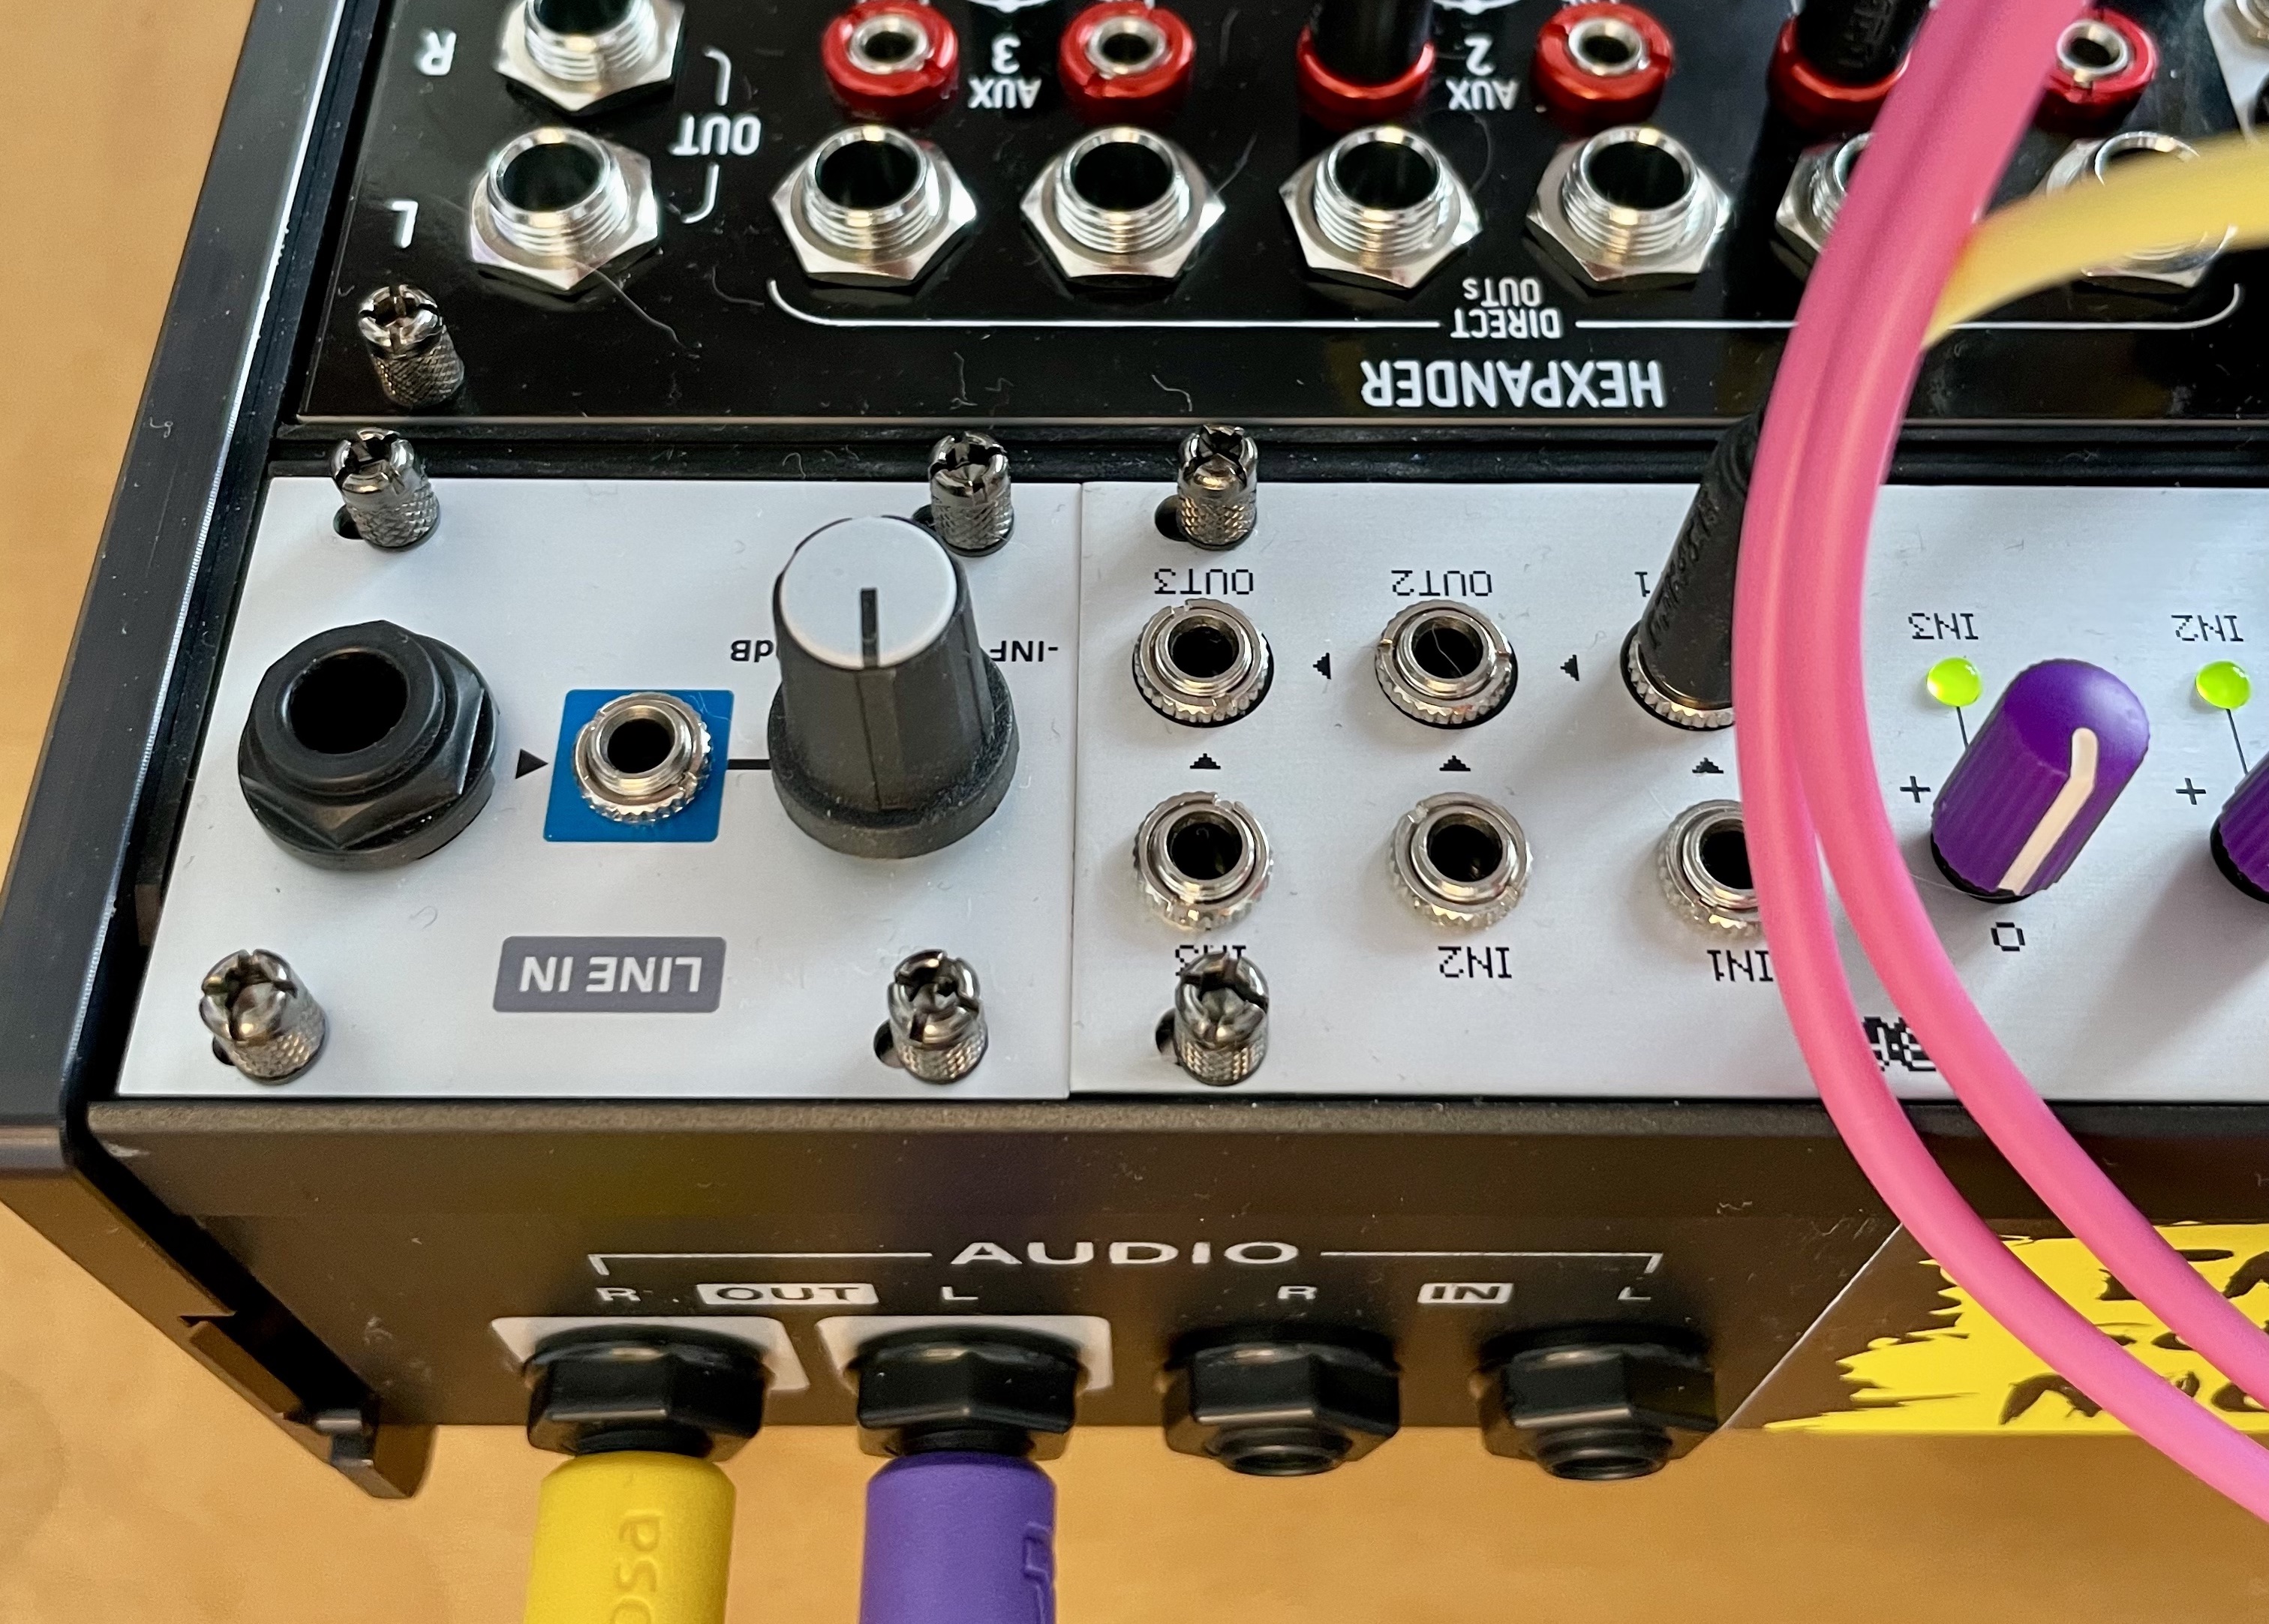
I got a new case for my Eurorack synthesiser. One of those fancy Intellijel Performance ones, with audio In and Out jacks on the rear panel. I like the idea of having at least those cables out of my way very much. Of course, like maybe every Non-Intellijel mixer, my Befaco HEXMIX has no connector for this. But blessed are they who do have a soldering iron and are not afraid to use it on their precious gear.
It is not very difficult to make your own connection cable and attach it to your mixer. I will describe in this text how I did it with my HEXMIX respectively HEXPANDER, but this should be possible with most other Eurorack mixers. Keep in mind that Eurorack audio is very loud (around 5-10Vp) compared to line level audio. The output Jacks of your case will not magically convert your loud Eurorack signal into a moderate line level signal. You could fry your connected gear!
What you need:
- a multimeter and an audio cable to plug in the jacks you want to measure (only if you have different gear then I’m using here)
- a soldering iron and some solder
- a 6-pole plug - one of those you use for Eurorack power supply but only 6-pole. Those plugs are called “Pfostenbuchse” in German. Funny word…
- a 6-pole ribbon cable. I just ripped away 4 wires of a 10-pole ribbon cable.
One more thing: The HEXPANDER’s Master Out and the Audio Jacks on the rear of the Intellijel cases are balanced. What I’m explaining here breaks this. You will get an unbalanced signal out of your case’s jacks. It would be possible to do this balanced, but I was lazy and I don’t need it (at the moment). If you need it balanced, because you have to use long cables, you can still use the HEXPANDER’s Master Out. Maybe I will update this How To in the future.
Okay, let’s do this
On the HEXMIX you have two ways to go. The first would be to use the Master out of the HEXMIX module. If you want to use those, configure the switches “S200” on the back of your HEXMIX to line level (remember, don’t fry you gear!).
The other way would be to use the Master Out of the HEXPANDER module which already is line level. I chose the latter.
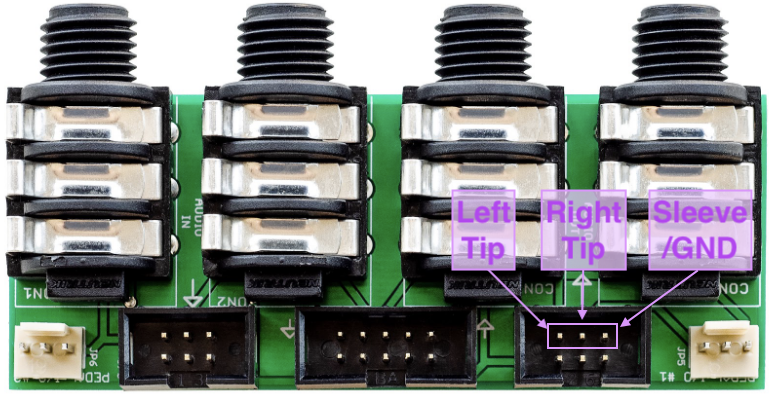
On the other side we have Intellijel’s Audio Jacks Board. In my case the 2nd generation (take a look to determine). The output signals go through the right 6-pin plug (“Pfostenstecker” in German). The easiest way to measure which pin is for what is by plugging in a cable in one of the audio jacks and measure with a multimeter from tip and sleeve of the cable to the different pins. Then do it again for the other jack (yep guessing would also be easy at this point, smart ass).
You don’t have to do it, if you have a 2nd generation Audio Jacks Board. I already did it for you.
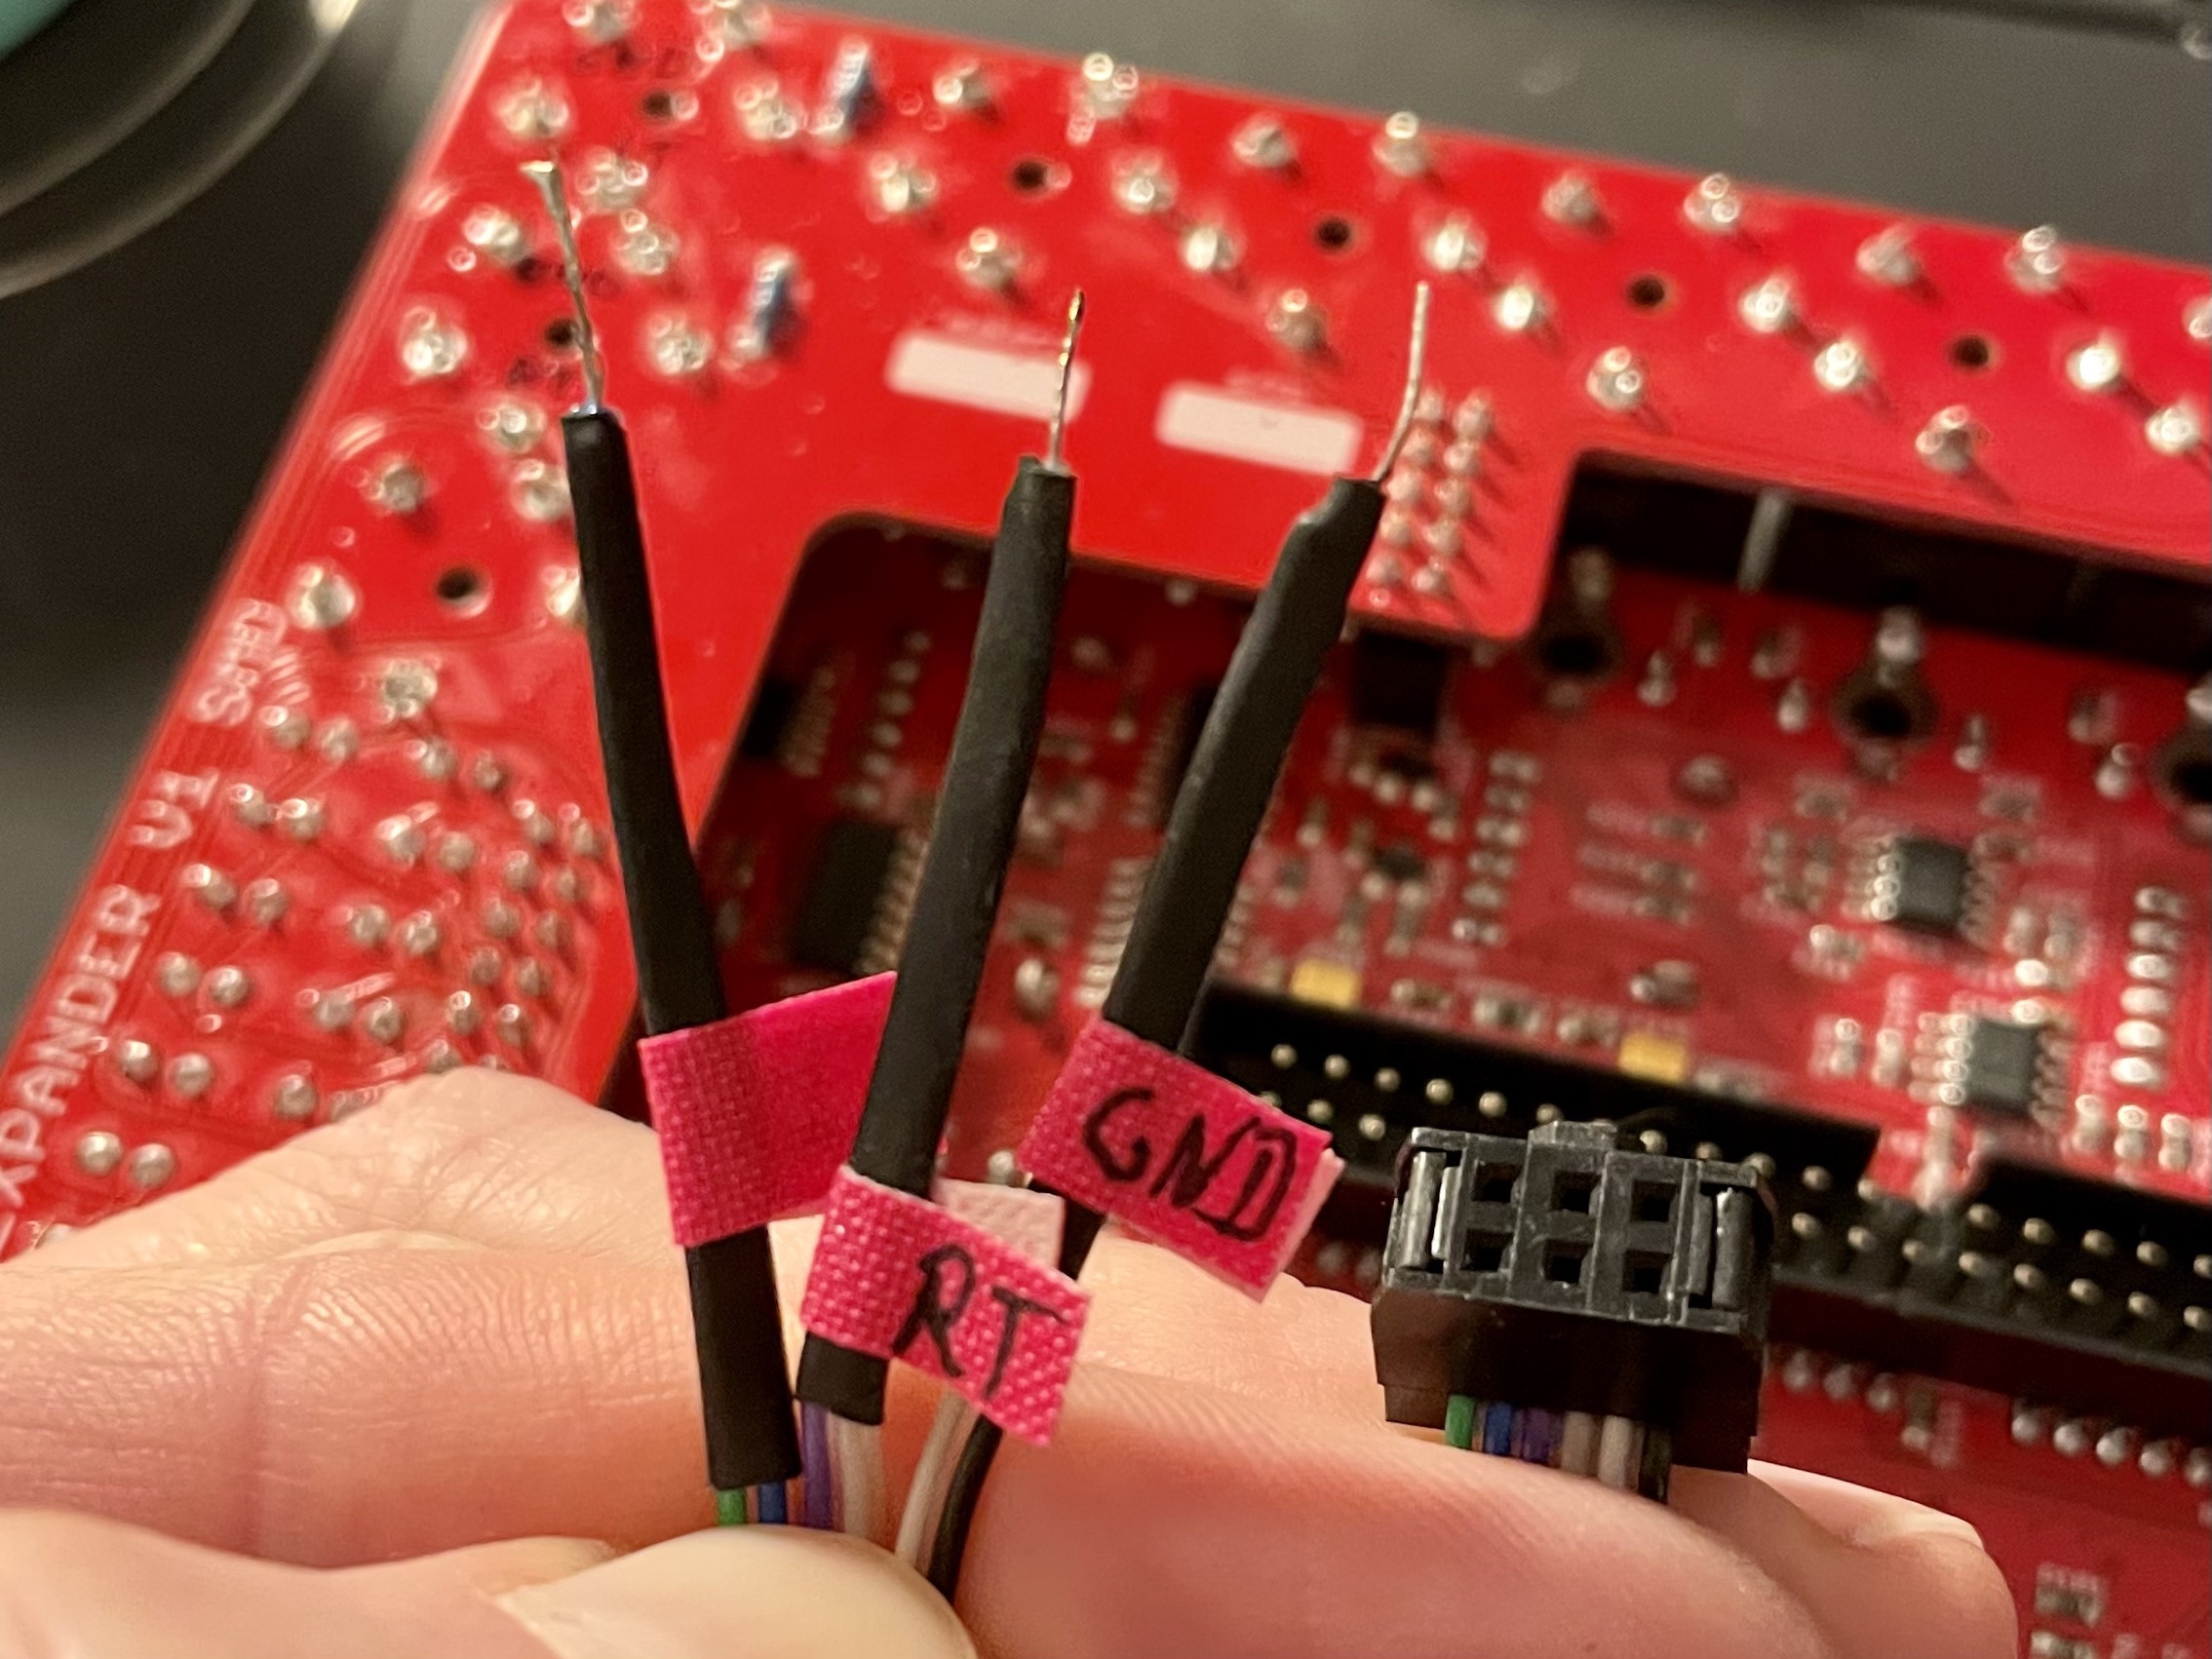
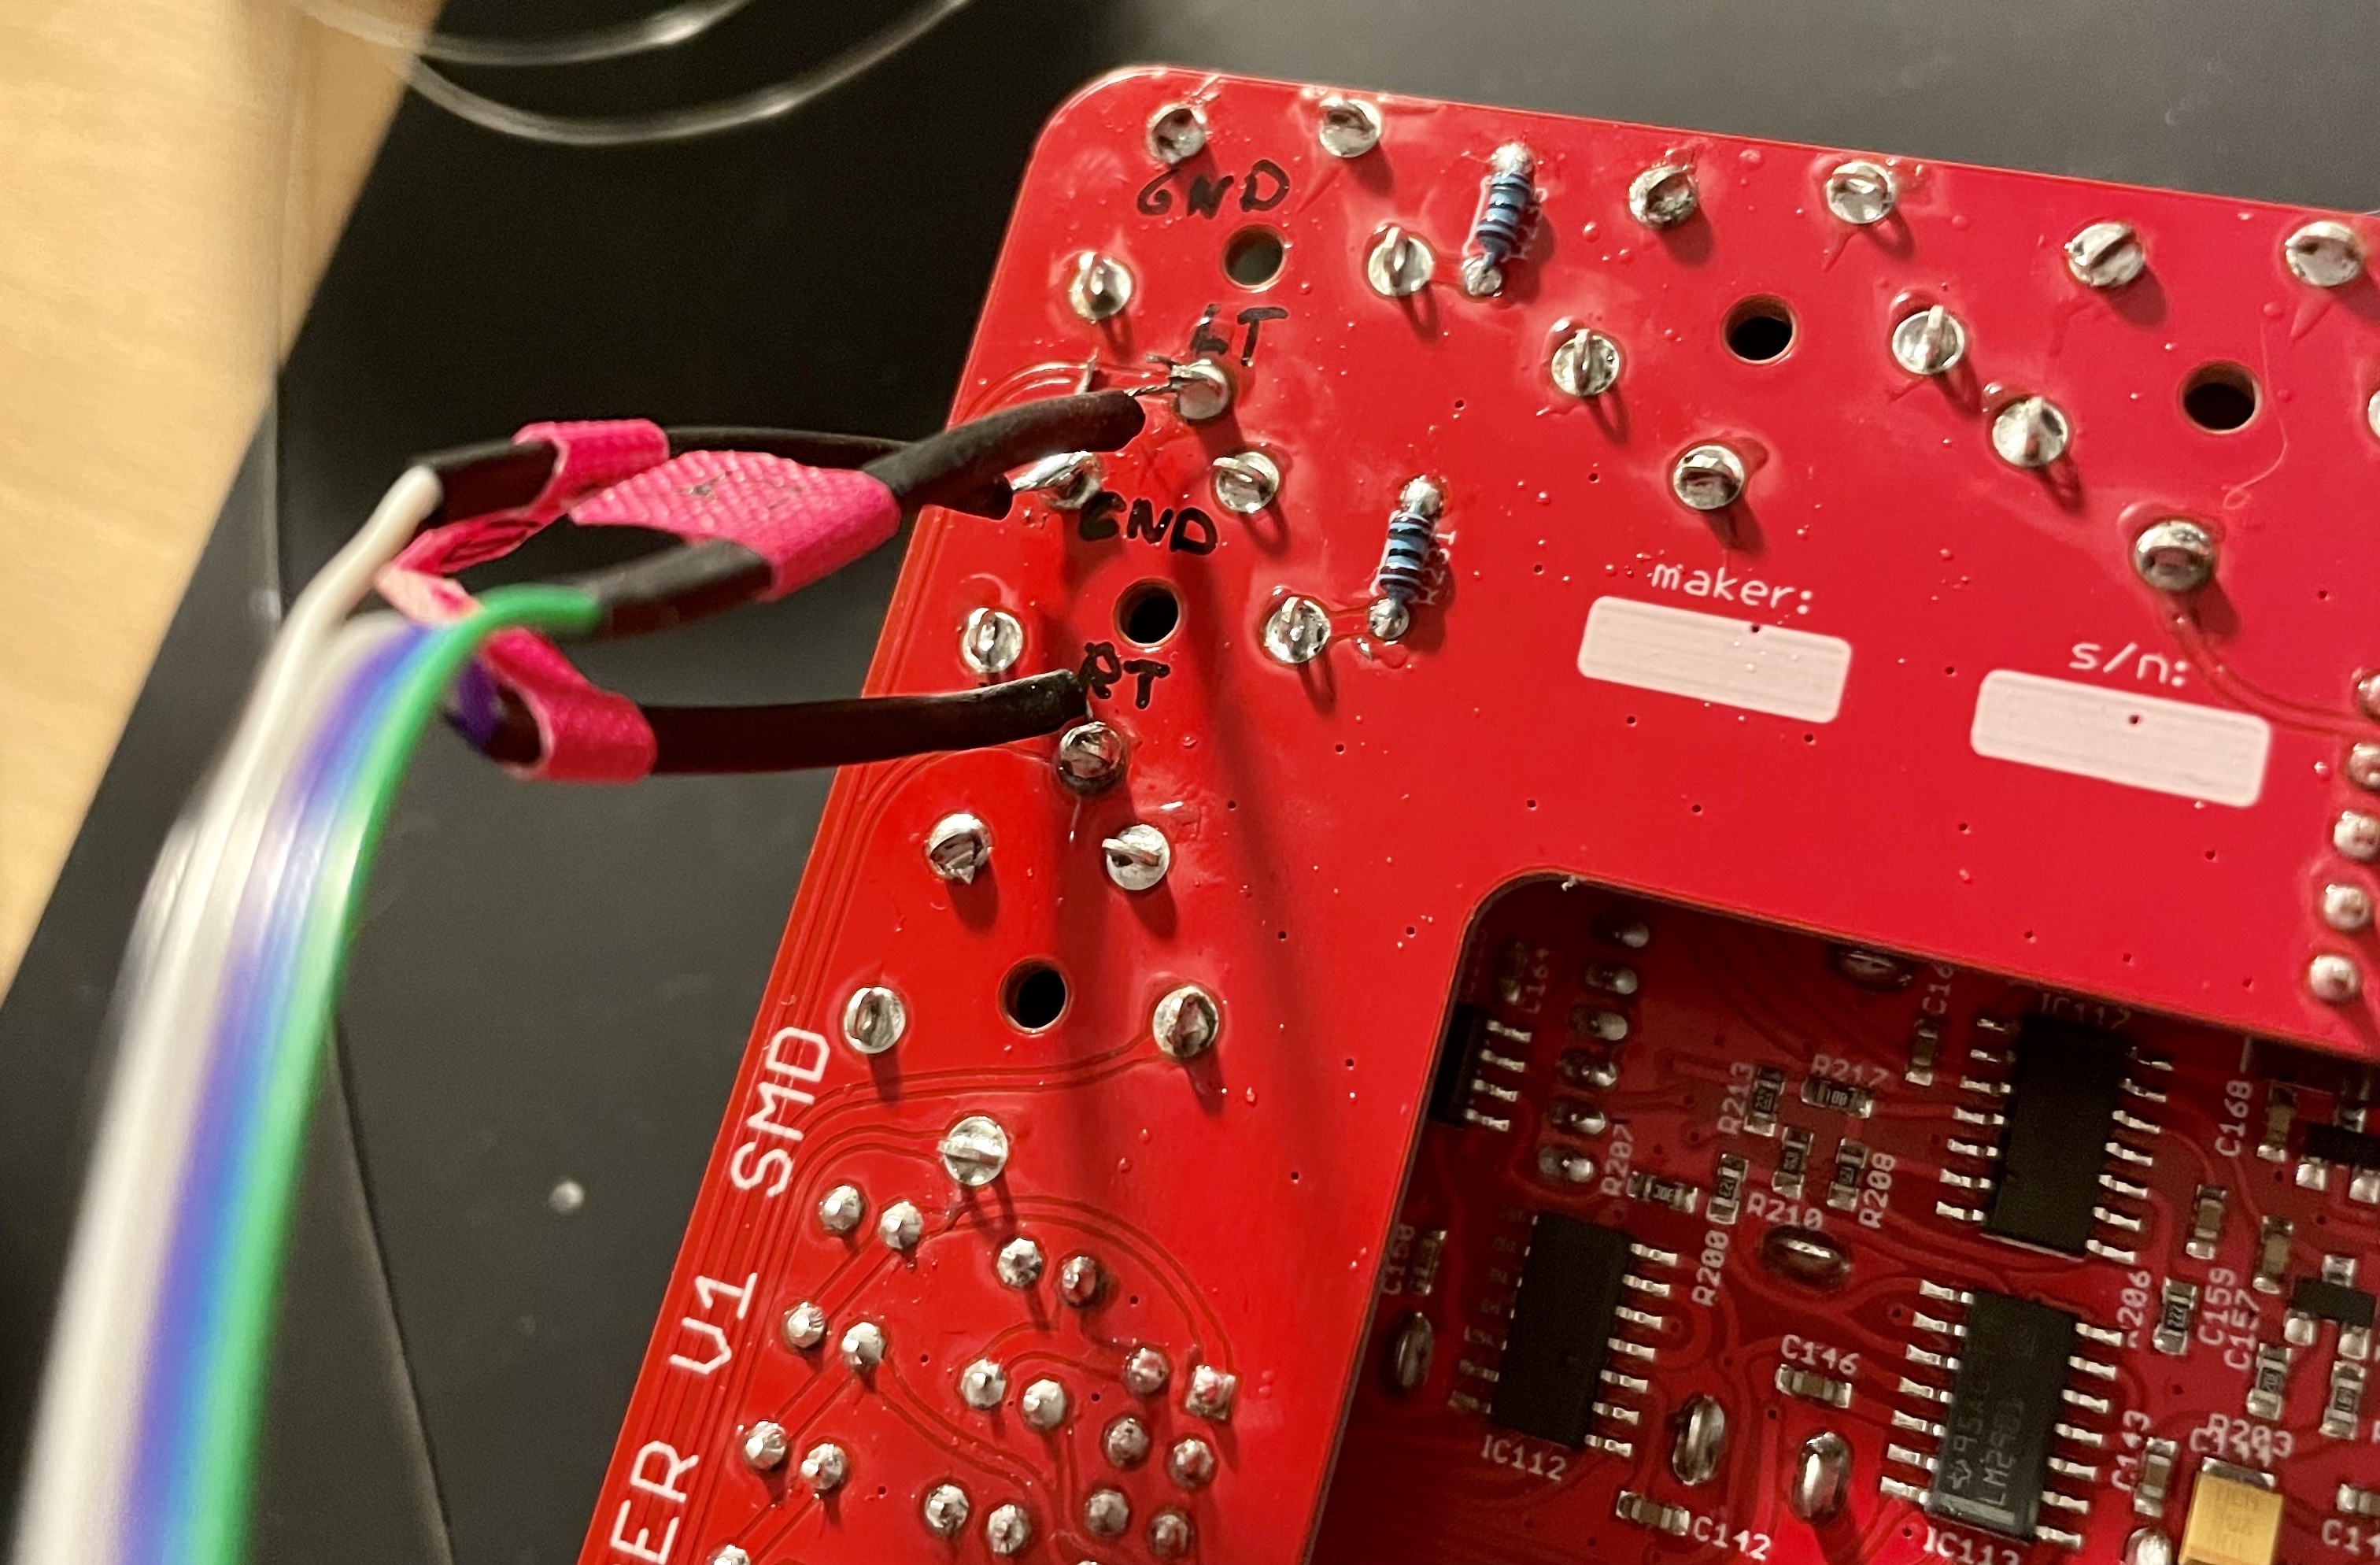
Put the Pfostenbuchse (plug) on one end of the cable. Split the other end of the cable and cut away the unused wires. Holding the wire like I do on the photo, the right wire of any pair is used (blue, grey, black). If you want to make sure, use your multimeter.
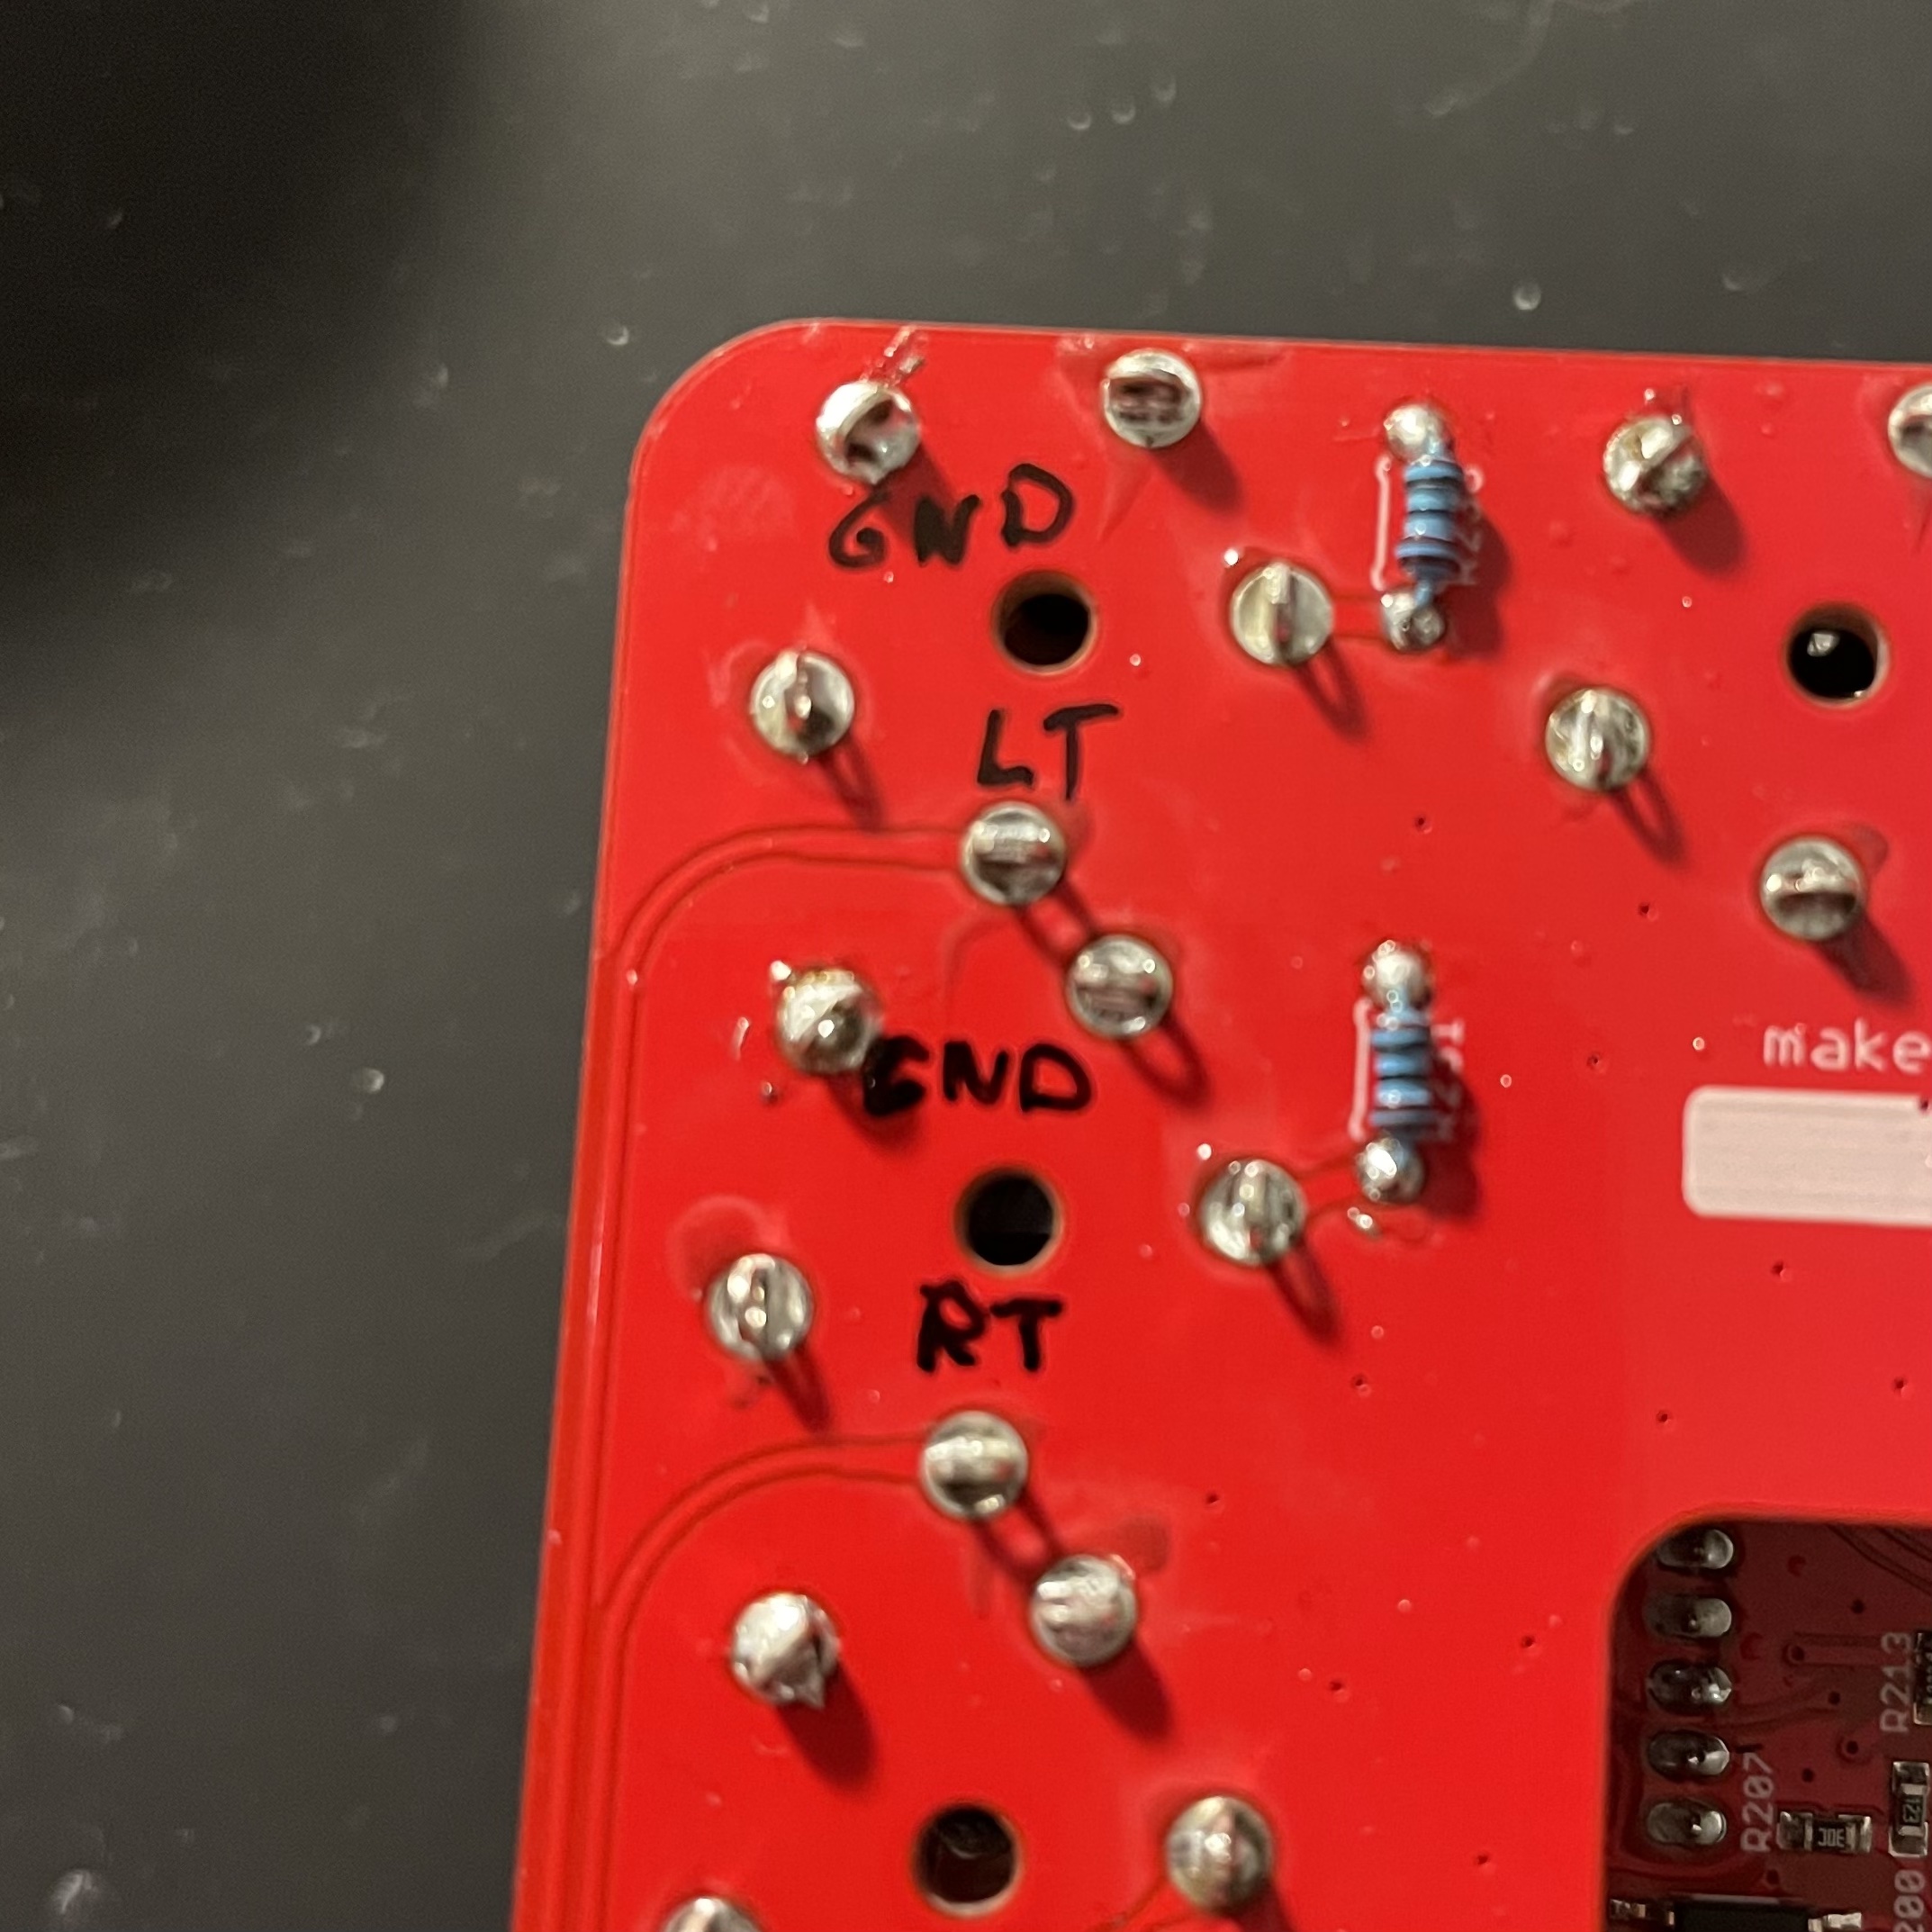
On your mixer, finde the pins of the output jacks and determine which one is for what. If you are also using a Befaco HEXPANDER and it looks like mine (there are variations) you can use my accurate and good looking markings (GND = ground/sleeve, LT = left tip, RT = right tip).
If it looks different or you are not using a HEXPANDER, measure like described above. Plug a cable in the jacks. Measure from tip and sleeve to the pins until you know. The sleeves are ground. All ground is connected. This is why there is only one ground wire for the sleeve pins of the left and the right jack in our ribbon cable.
Solder the separated wires of the ribbon cable to the identified pins and plug the other end of the cable into the Pfostenstecker (plug) of the Audio Jacks Board in your case.
If you managed to not break your stuff (Which would absolute be not my fault!), you might be happy now. I was. I still am. Have fun and maybe show me a picture or something audible of your work. I would appreciate it very much. You can reach out to me via social media.
